| Sv translation | |||||||||||||||||||
|---|---|---|---|---|---|---|---|---|---|---|---|---|---|---|---|---|---|---|---|
| |||||||||||||||||||
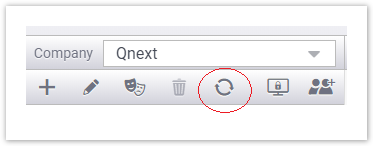
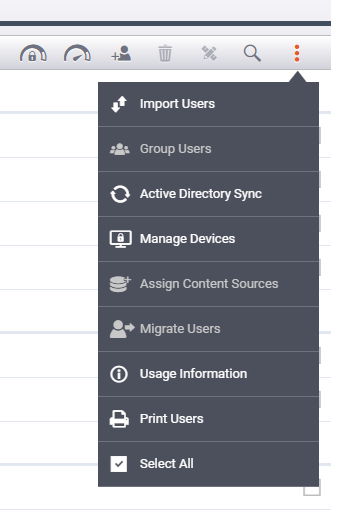
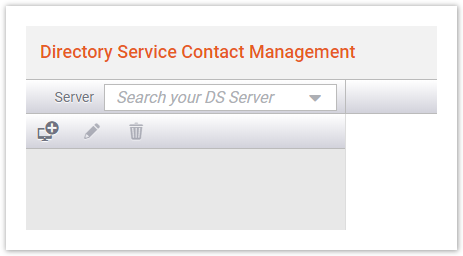
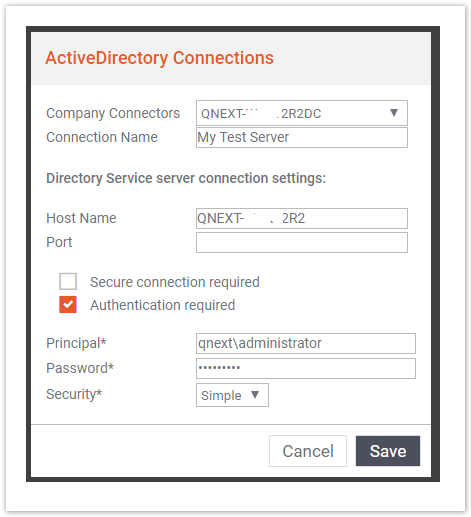
OverviewAs a user administrater, you have the option to import users in FileFlex from the Active Directory(AD) and sync groups between FileFlex and AD so that user management can be done in AD itself. PrerequisiteFileFlex Server can be hosted on cloud or any network where AD may or may not be present. In order for FileFlex to connect to AD Server, it needs at least one FileFlex Connector Agent installed on the same network where the AD server is installed. Before you initiate AD integration ensure that there is a device where the FileFlex Connector agent is installed. The device should be always up and running and should not be occasionally turned off. More details about connector agents can be found here. How to integrate Active Directory with FileFlex?
or
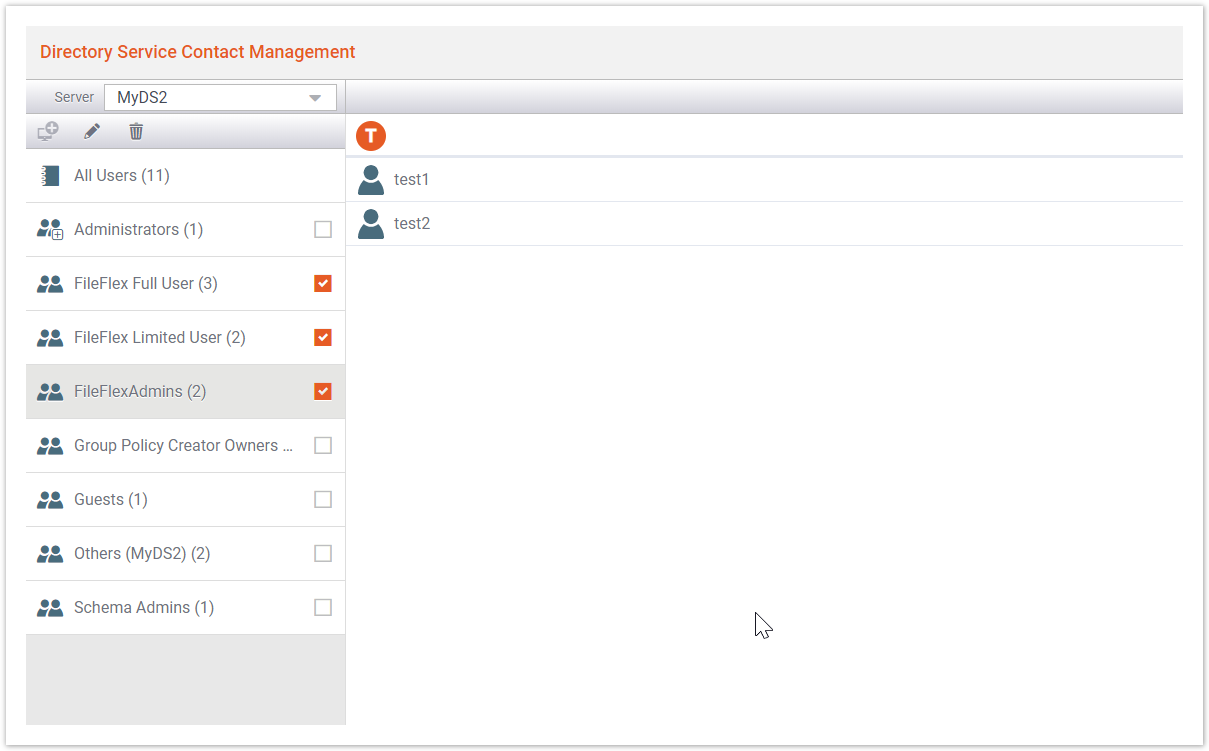
How to sync AD group with FileFlexThe purpose of the previous step was to enable FileFlex Server to communicate with the Active Directory server and import existing contacts so that the regular users of Fileflex can start using the pre-existing groups and contacts created in AD and share items with them. This enables you to do user management at one place i.e. Active Directory and not repeat the same in FileFlex. Once the import and integration with AD get completed, as an admin you would want to specify which groups in Active Directory you want to assign for full users of Fileflex. As an admin, you would need to mark the groups whose members are supposed to get license to use Fileflex. Users in the selected group(s) would be counted as purchased seats in FileFlex Server. Other users who are not marked can only view content that is shared with them by a full user of fileflex. As an example below, In below AD server connection, admin wants to only select users under the groups meant for FileFlex Users and FileFlex Admin marked them checked. This means all the users of these three selected groups will be counted towards Fileflex user quota.
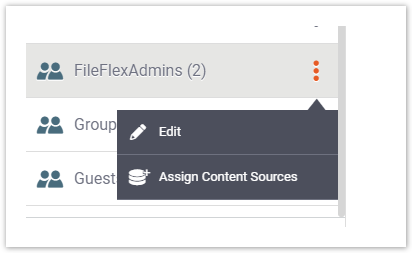
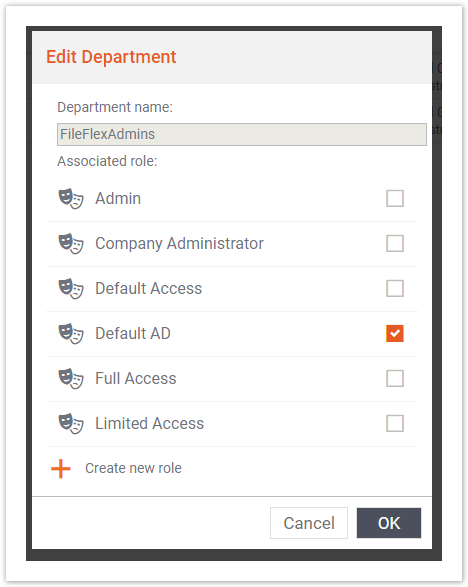
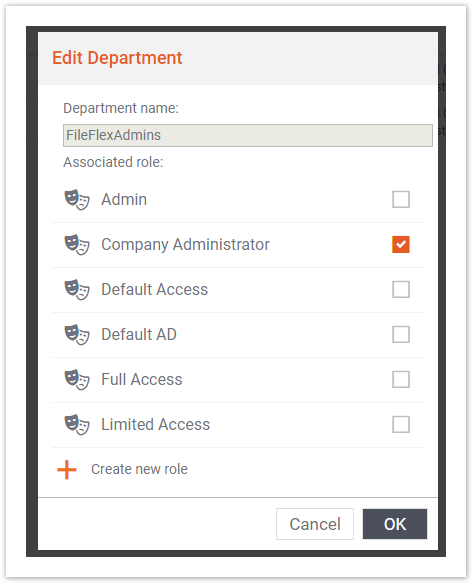
Creating FileFlex Regular User groupIt is recommended that you consider creating new group(s) in Active Directory and ensure all users who need to have Fileflex access are part of it. If you want to add or remove access you need to edit this group membership on Active Directory and it gets replicated to FielFlex. As an e.g. shown above, admin has created three groups meant for FileFlex Administrators, FileFlex users with full permission and FileFlex with limited permissions. Concept of permissions is explained in detail here, Once the groups are checked you would need to change the role of the group as by default they are given default access to Fileflex. Editing Group PermissionsClick on the selected group and click on the context menu as shown below. Click EDIT. Change the roles appropriate for the group. In this example, we would select the company administrator for this group. Click OK and group role is now changed. All the users of this group will now have the FileFLex Admin role. Repeat this for all newly created Fielflex groups. Click here for more information on roles and permission.
Error ReportingIn case there are issues with the sync e.g. Device hosting FileFlex Connector Agent is down, or AD server is down or AD groups to be synced exceed the seat quota, all such issues are reported to the company administrators via email. All the administrative users who have company admin access will be sent an email on regular intervals till the problem is resolved. |
| Sv translation | |||||||||||||||||||
|---|---|---|---|---|---|---|---|---|---|---|---|---|---|---|---|---|---|---|---|
| |||||||||||||||||||
概要ユーザー管理者は、ユーザーを Active Directory (AD) から FileFlex にインポートし、FileFlex と AD の間でグループを同期することで、AD 自体でユーザー管理を行えるようにするオプションがあります。 前提条件FileFlex サーバーは、AD が存在するか否かにかかわらず、クラウドまたは任意のネットワークでホストできます。FileFlex を AD サーバーに接続するには、AD サーバーがインストールされているのと同じネットワークに FileFlex コネクタエージェントが少なくとも 1 つインストールされている必要があります。 AD 統合を開始する前に、FileFlex コネクタエージェントがインストールされているデバイスがあることを確認してください。デバイスは時々オフにすることなく、常時稼働している必要があります。 コネクタエージェントの詳細については、こちらをご覧ください。 Active Directory を FileFlex と統合する方法
または
AD グループを FileFlex と同期する方法前の手順の目的は、FileFlex サーバーが Active Directory サーバーと通信し、既存の連絡先をインポートできるようにして、FileFlex の通常のユーザーが AD で作成された既存のグループと連絡先を使用してアイテムを共有できるようにすることです。これにより、Active Directory などの場所で一元的にユーザーを管理することができ、FileFlex で同じことを繰り返す必要がなくなります。 インポートと AD との統合が完了したら、管理者として、FileFlex のフルユーザーに割り当てる Active Directory 内のグループを指定します。 管理者は、FileFlex を使用するためのライセンスを取得することになっているメンバーがいるグループにマークを付ける必要があります。選択したグループのユーザーは、File Flex サーバーの購入済みシートとしてカウントされます。マークされていない他のユーザーは、FileFlex のフルユーザーが共有するコンテンツのみを表示できます。 以下の例の AD サーバー接続では、管理者は FileFlex ユーザーにするグループのユーザーのみを選択したいと考えており、FileFlex 管理者はそれらにチェックを入れました。これは、選択した 3 つのグループのすべてのユーザーが FileFlex ユーザークォータにカウントされることを意味します。
FileFlex の通常ユーザーグループの作成Active Directory に新しいグループを作成し、FileFlex にアクセスする必要があるすべてのユーザーをそのグループに含めることを検討することをお勧めします。アクセスを追加または削除する場合は、Active Directory でこのグループメンバーシップを編集する必要があります。その編集内容は、FielFlex にレプリケートされます。 上記の例のように、管理者は、FileFlex 管理者、完全な権限を持つ FileFlex ユーザー、および制限された権限を持つ FileFlex ユーザーという 3 つのグループを作成しました。権限の概念については、こちらで詳しく説明しています。 グループをチェックしたら、デフォルトで FileFlex へのアクセス権が付与されているに過ぎないため、グループのロールを変更する必要があります。 グループ権限の編集選択したグループをクリックし、以下に示すようにコンテキストメニューをクリックします。 [編集] をクリックします。 ロールをグループに適したものに変更します。 この例では、このグループの会社の管理者を選択します。 [OK] をクリックすると、グループのロールが変更されます。これで、このグループのすべてのユーザーに FileFlex 管理者ロールが付与されます。 新しく作成されたすべての FileFlex グループに対してこの操作を繰り返します。 ロールと権限の詳細については、こちらをクリックしてください。
エラー報告FileFlex コネクタエージェントをホストしているデバイスがダウンしている、AD サーバーがダウンしている、同期する AD グループがシートの割当量を超えているなど、同期に問題がある場合、そのような問題はすべて E メールで会社の管理者に報告されます。 会社の管理者アクセス権を持つすべての管理ユーザーには、問題が解決するまで定期的に E メールを受信します。 |
