Backup and Restore
This section describes the backup and restoration features available within the server administration module.
Backup and Restore Overview
Clicking on the "Backup & Restore" tab will reveal the following panel:

The screen is divided into two columns:
- The left hand side represents backup tasks and schedules.
- The right hand side lists all the backups performed according to the associated task.
Backup Task Panel
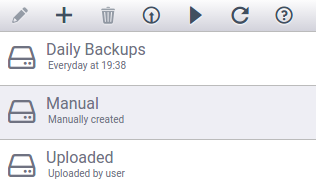
The backup task panel contains a toolbar of backup and restoration actions, along with a list of backup tasks:
The backup and restoration tools available are defined as follows:
| Edit the selected backup task. Use for example to change a daily backup to a weekly backup schedule. |
| Add a new backup task. Use for example to start backing up files daily. |
| Delete the selected backup task. Used to stop executing backups. |
| Upload a backup from the administrator's local machine. Used to immediately restore data that you have locally available. |
| Perform an immediate backup if the "manual" or "uploaded" rows are selected. If a configured backup task is selected, executes it immediately including it's associated offsite backup. |
| Refresh the backup list. This is used in case the list is ever out of date because of a background backup task that happened while the panel was already opened. |
| Open context-specific help relating to backup and restoration. |
Below the toolbar is a list of backup tasks. Two items are permanently displayed:
| Manual | List all manually backed up datasets (e.g. backup immediately) |
|---|---|
| Uploaded | List all manually uploaded datasets (e.g. uploaded by the administrator) |
The other items in the list (for example 'daily' in the example above) are backup tasks that have been configured by the administrator to execute automatically. For instance daily backups, weekly backups, etc. Selecting a row from the list will visualize a filtered list in the backup task listing on the right hand side.
Backup Listing
Every backup task has a set of backup files associated with it (which could be empty). Selecting a backup task on the left will show a filtered list of backups on the right:
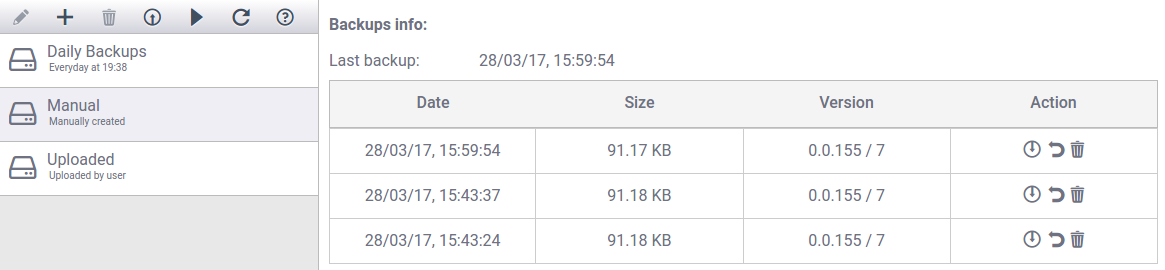
Each backup row shows it's date, size, version and a set of actions available to be performed with that particular backup. Consult the following table for more details:
| Backup Column | Example | Meaning |
|---|---|---|
| Date | 22/03/17, 12:41:47 | The backup was taken on March 22, 2017 at 12:41:47 |
| Size | 8.63 MB | The backup occupies 8.63 MB of space |
| Version | 0.0.153 / 7 | The configuration that was backed up has version 0.0.153 The data that was backed up has version 7 |
| Action |
| Download, Restore and Delete operations on that backup |

Backup Data or Configuration?
Configuration and data backups are handled separately. The reason for this is that you might want to back up your data when upgrading to a clustered deployment. Doing so would require radically different configuration, but the same underlying data. In that situation you would only restore the data.
Manual Backup
There are two kinds of backups which can be executed. The first and simplest is a manual back, which we'll describe here. A manual backup is executed immediately, and the data is stored within the VM. This is likely not where you'll want to store the backup files long term, so it's assumed that you'll download a local copy and store it someplace safe outside of the virtual image.
Select the 'manual' entry in the backup tasks on the left

Click on the backup now icon  to initiate an immediate backup. After a moment you will see it listed on the right hand side:

Your backup is now complete, but unfortunately it's stored within your VM which isn't ideal. You should download a copy to your local device and then back it up somewhere of your choosing.
Click the backup tool  of the backup set to download. You will be prompted if you want to download the configuration or data:

Select configuration followed by OK and the configuration data will be downloaded to your local machine. Repeat this procedure, downloading the data instead. You will now have two archives locally which you can use to restore configuration and/or data at any point in the future.
Restoring from Backups
Once you have a backup you must be able to restore it. If the data is already contained in your VM as a backup set, you can restore it directly from there without uploading it in to your VM. If however you backed up your data somewhere manually (as suggested above), you'll need to upload your archives into the VM first.
Uploading Backups to the VM
Select the Uploaded row from the backup tasks on the left hand side to see all uploaded backup sets:

Ensure that your backup is not listed on the right hand side. This document assumes that it is not listed there. Click the upload action  from the backup toolbar. You will then be asked to select a file from your local machine.
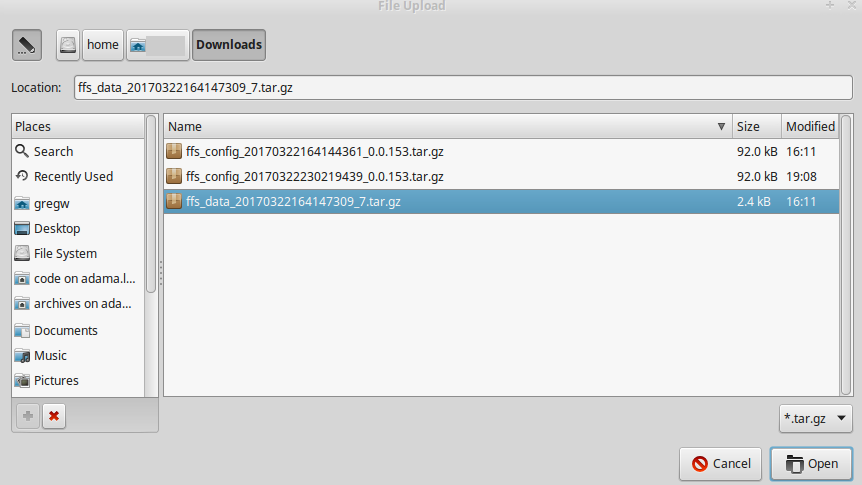
You can select either configuration or data backups, and the upload will automatically detect which type was provided. Here we are assuming you selected a data backup set.
It's important to understand that uploading a backup set is not the same thing as restoring it. It has simply been copied into the virtual machine.
Once the upload is complete, you will see it listed on the right hand side:

Restoring Backups
Once a backup set has been located within the VM (and it can be within any of the filters from the backup task list on the left), you can restore it.
A backup set may contain configuration information, or user data, or both
Prior to restoring a data set you must shut down the active processes. Click on manage servers on the left, and then select your active server:

Click the manage button on the right to expand the server details:
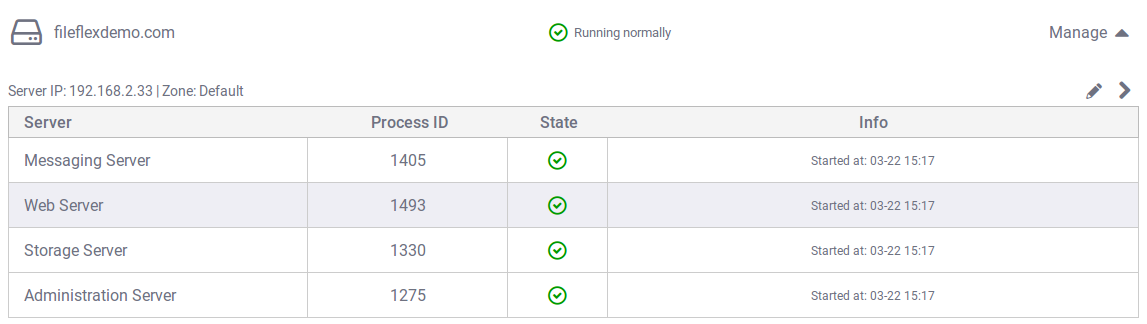
Select the "web server" process followed by clicking the stop icon  from the top menu. After a few moments you'll see the server listed with a warning that some processes are stopped:

Return to the backup and restore tab and select the "uploaded" backup task filter. Locate the backup set you wish to restore.
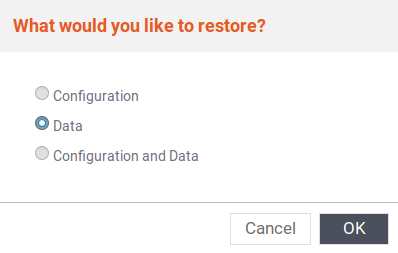
Once you identified backup set, click the restore action  . You will then be asked if you want to restore configuration or data. Assuming you chose a backup set with data in it, select the data option (again, assuming that's what you're attempting to restore):
After clicking OK wait a few moment. When the operation completes, you will be returned to the backup set listing.
Congratulations - you've restored from backup!
Scheduling Backups
Scheduling automated backups is an important component of any backup strategy. You can configure FileFlex to automate backups on a variety of schedules, but something similar to a daily and weekly combination is recommended.
Creating an Automated Backup Task
Start by clicking the new backup task button  from the backup toolbar. You will then be presented with a scheduling dialog box:
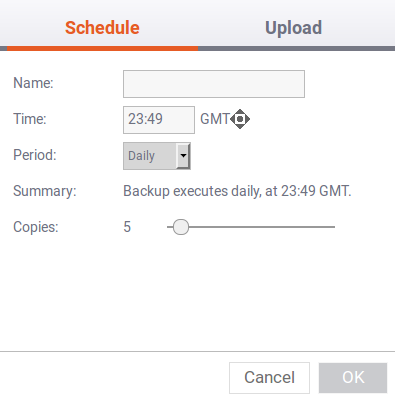
This is where you control exactly when the backups will be executed for this particular backup task.
You may have any number of concurrently configured independent backup tasks. For example you can have daily backups, weekly backups, and first of the month backups.
Start by entering a name for your backup task:

Select a backup start time (defined in Greenwich Mean Time - GMT) for the backup set. For example, we will select midnight GMT:

You can optionally use the diamond shaped control to the right of the time selection to increment the minutes and hours.
The next step is to select the time period for the backups.
One Time Backups
One time backups allow you to backup on a specific day at a specific time one time.
Select "Once" from the period dropdown:

A summary will be shown along with an empty date field.
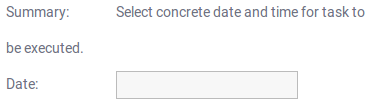
Click in the date field to reveal the date picker:
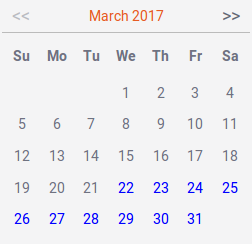
Select the date you want the backup performed.
Daily Backups
Daily backups allow you to backup every day at the specified time.
Select "Daily" from the period dropdown:

Weekly Backups
Weekly backups allow you to backup once a week on a selected day of the week at the specified time.
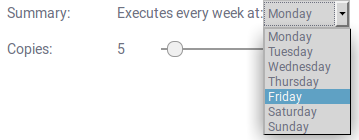
Select "Weekly" from the period dropdown:

Select the day of the week you'd like to have the backups performed:
Monthly Backups
Monthly backups allow you to backup once a month on a selected day of the month at the specified time.
Select "Monthly" from the period dropdown:

Select the date (day of the month) you'd like to have the backups performed:
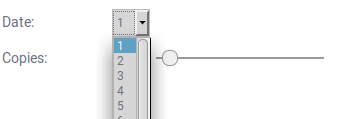
Only 28 days are allowed in the monthly backup schedule. It is not possible to select the 29th, 30th, or 31st of the month.
Number of Backup Copies
Since backups consume space within the virtual machine, it's important to limit the number of copies to retain for any backup task.

Drag the slider left or right to adjust the number copies. Values from 1 to 100 may be selected.
It's a good idea to set the number of copies to a value that matches your time period. For example consider using 7 copies of a daily backup task, combined with 4 copies of a weekly backup task, combined with 12 copies of a monthly backup task to get a complete combination of backups from which to restore.
Once you're satisfied with your settings, click OK to confirm the backup schedule. You will then see your new entry in the list of backup tasks:

Congratulations - you've finished configuring your first backup schedule!
Offsite Backups
Offsite backups are a mechanism of automating the uploading of backup task results to a remote server. Keeping offsite copies allows you to automate the extraction of backup data from the FileFlex virtual machine and into your external servers for safe keeping.
Offsite backups work with SFTP and rely on public/private keys to secure the transfers. Ensure that you have a public key enabled SFTP upload target before proceeding with this tutorial.
To enable offsite backups within your backup task, select the "Upload" tab in the backup task dialog:
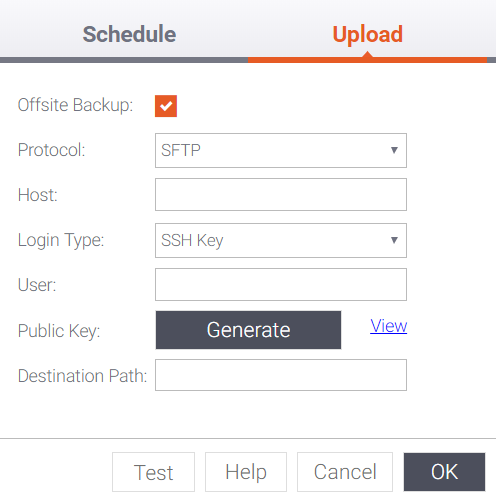
You will then have to click the "Offsite Backup" check box to enable automated uploads of your backups:

From the "Protocol" dropdown, select the "SFTP" option:

Advanced
Although out of scope for this documentation, there is an advanced uploading mechanism allowed for. By selecting "Local Copy" from the "Protocol" dropdown, FileFlex will perform simple a local filesystem copy of the backups. Consider the following:
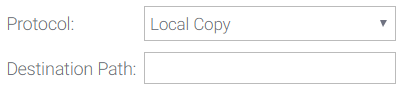
It is possible for you to SSH in to the virtual machine and configure (for example) an NFS mount point to a remote server of your choice. This would allow you to schedule the "copy" of backup sets to your NFS destination. Any mountable target is possible (for example, Samba, etc).
Enter a server/host you wish to connect to. In this example, we're connecting a local network IP:

Select the login type you wish to use. The options are "SSH Key" and "Password". This tutorial assumes that you will be using an SSH Key.

Using an SSH Key is more secure than using a password and is therefore the more desirable option.
Enter a username for your remote SSH connection:

Next, you will need to generate a public/private keypair. Click the "generate" button to do so:

Click the "view" link to show the public key contents:
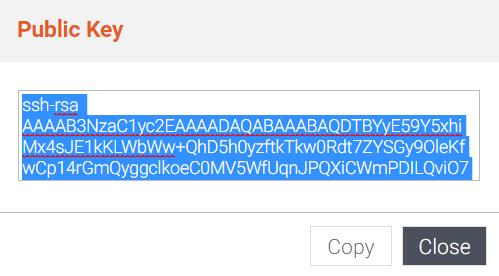
Copy the key into your clipboard by clicking the copy button, and then close the dialog by clicking the close button.
Open a text editor, and paste the content of the key into it. Save the file somewhere in the file system of your current browser's operating system.
Uploading Your Public Key
In order to be allowed to upload into the remote SFTP server without a password being entered, you must upload your public key into that server. The specific instructions differ for varying destination server deployments, as well as for your current operating system. We assume you are using a desktop Linux (or Mac) system for this section of the documentation. If you are using windows, please adapt these instructions and use an application such as WinSCP.
For a typical Linux destination server, and assuming a user named "bkuser", the following steps will SCP the public key from the current host machine (containing your saved public key) to the remote machine using a password. From that point on, the public key will allow the backup process to upload remotely without a password. The example below assumes a remote host at 192.168.2.60, and a public key file named 'backup.pub'. Adjust your commands accordingly.
Run the following command, replacing the 'bkuser@192.168.2.60' with the appropriate user and IP for your backup destination.
awk 1 ~/backup.pub | ssh bkuser@192.168.2.60 "mkdir -p ~/.ssh && cat >> ~/.ssh/authorized_keys && chmod 600 ~/.ssh/authorized_keys"
Enter the password for the remote system when prompted. The remote system should now have your public key associated with the (example) bkuser account.
Enter a remote directory into which to place the backup files:

Click the test button to ensure everything is working. You should see a success message:
Click OK. Congratulations - when your backup task is executed your backups will be securely uploaded to the selected location using SFTP!