Note: You will need authorization from your IT department in order to be able to group contacts. If you have permission, use the following steps to group contacts.
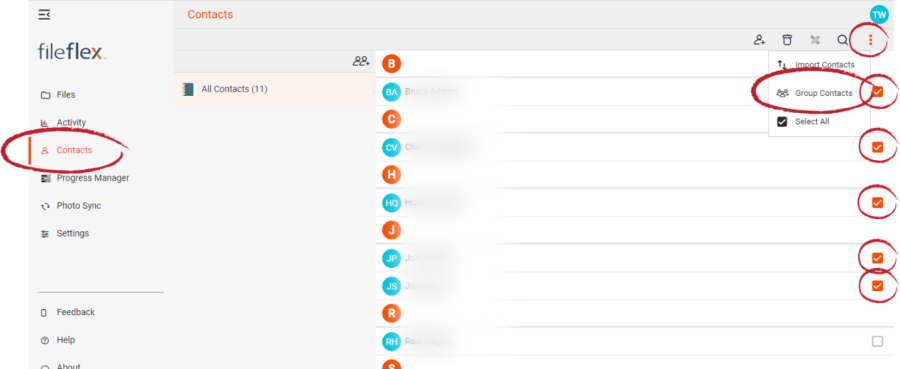
- Open the contact view by selecting Contacts in the Application sidebar menu
- Select the contact(s) that you want to group
- Click the Activity Menu icon in the top right of the Activity Bar
- Choose Group Contacts
Group Contacts
- In the Groups dialog box, you can assign the contacts to a pre-existing group or you can create a new group. To create a new group, select Create a new group.
- In the New Group dialog box, enter a name and then select OK.
