FilFlex Add-in can be published to your Exchange by your admin or can be added by yourself using a custom add-in.
In both methods the manifest URL needs to be copied and entered while adding the add-in.
Locating Manifest URL
Log to FileFlex with any supported browser or native desktop client ( as an end user and not FileFlex admin) .
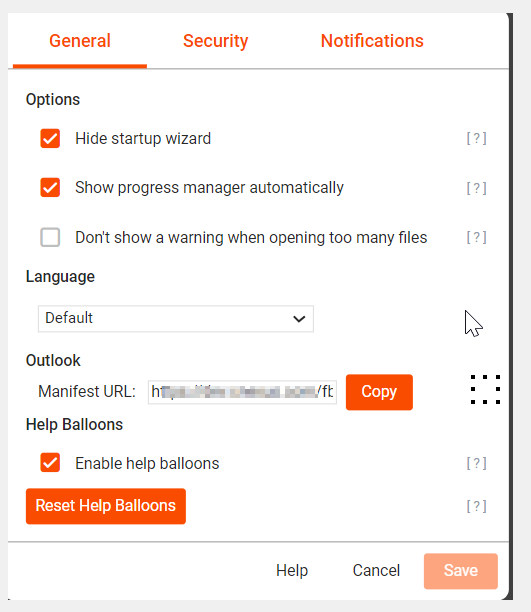
Go to Settings →General as shown below.
The manifest URL is shown as below and should be copied to be used in subsequent steps.
Adding using custom Add-in
In your Outlook client click on Get Add-in from the toolbar.
Click on "My add-ins" from the sidebar and then select "Custom Addins "
From dropdown, select "Add from URL"
Enter the manifest URL copied in earlier steps here.
Click "Install" once the warning is displayed.
This completes your adding of FIleFlex Add-in.
Adding in Admin managed provider.
Your admin may have already made the add-in available in your environment. In those cases follow the below steps.
In your Outlook client click on Get Add-in from the toolbar.
Click on "Admin-managed" from the sidebar.
You should locate the FileFlex tile on the subsequent page and click "Add" button.
This will add the FileFlex add-in to your Outlook client.


