Note: Each user that you import will consume a paid. It will only import if the number of users is less than the number of unused paid seats available. For example, if you have paid for 50 seats and import 70 users, it will not import any users. The number of imported users should always be less than the number of unused seats available.
1. Prepare a comma-delimited csv file of the users to import. The file only needs two fields per user - the user's name (full name) and the user's email.
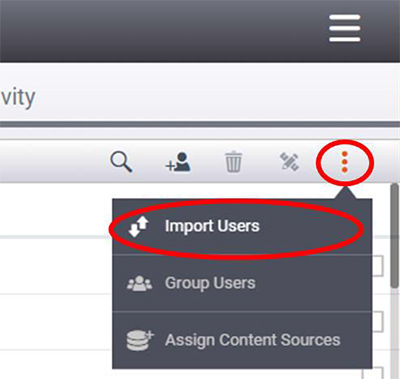
2. In the Company Management tab, in the dropdown from the right side activity menu (3 dots), select Import Users.
Prepare csv file, then Import Users
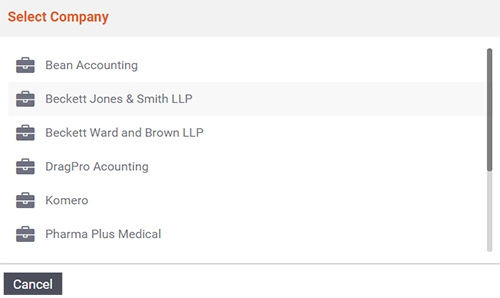
3. Select the company that you are importing the user to. Then click OK.
Select Company
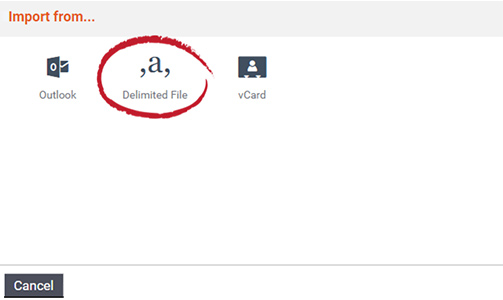
4. Select Delimited File (for detailed instructions on importing from Outlook, Google Mail, Linked In, and Yahoo Mail see, User Management - Importing Users)
Select Delimited File
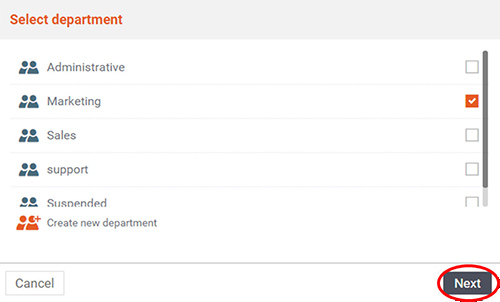
4. Select a department to add the users to and click Next.
Tip: If you are importing a high number of users who do not all belong to the same department, you can create a temporary department to add the new users to and sort them later. See Edit/Manage a User for more information on how to do so.
Select Department
5. When you import users, an auto-generated email will be sent to them with their FileFlex user name and password and a link to their onboarding instructions.
Note: Each user that you import will consume a paid FileFlex seat that you have purchased. Do not import users for which you do not want to purchase a FileFlex account.
Format of The Delimited File
If you are manually creating a comma limited file, you can refer below for a sample file and formats.
You can also provide names in First, Middle and Last name format.


