Page tree

Versions Compared

Key

  • This line was added.
  • This line was removed.
  • Formatting was changed.
Sv translation
languageen


Create

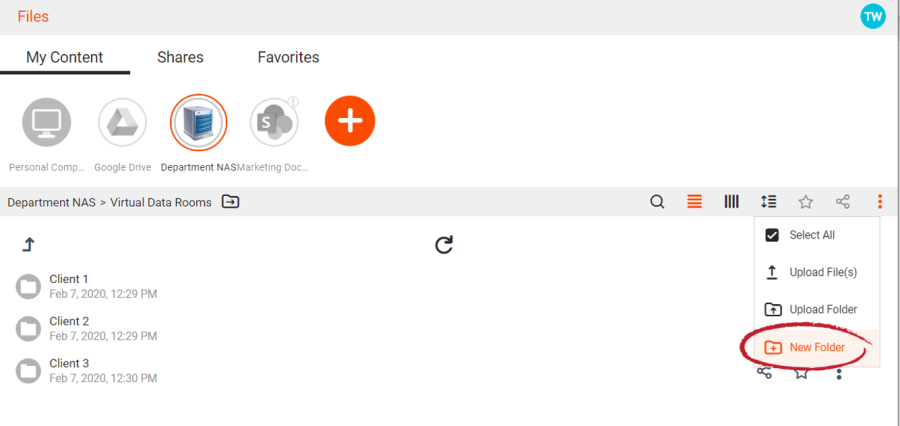
1. Create a folder that can be shared. In the example

below we

below, we have set up virtual data room folders for 3 clients by simply creating folders that can be shared. 


Image Modified
Create folders that will be used as Virtual Data Rooms


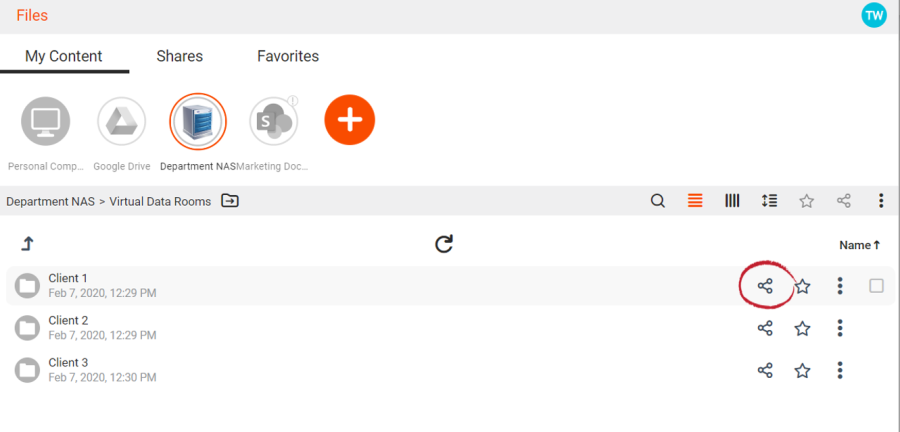
2. Click the Share icon for the folder/data room and bring up the Share dialog.


Image Modified
Share the folder/data room


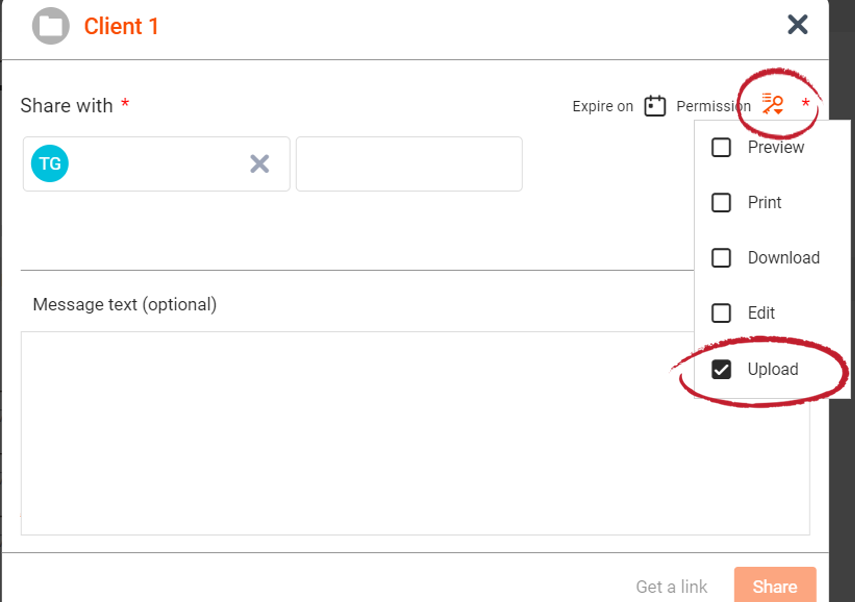
2. In the share dialog, add recipients. In the sharing options, allow for uploads by clicking the 'Upload' radio button.  This converts the folder into a virtual data room by allowing the recipient to upload files and folders.

Image Modified
Provide Upload permission


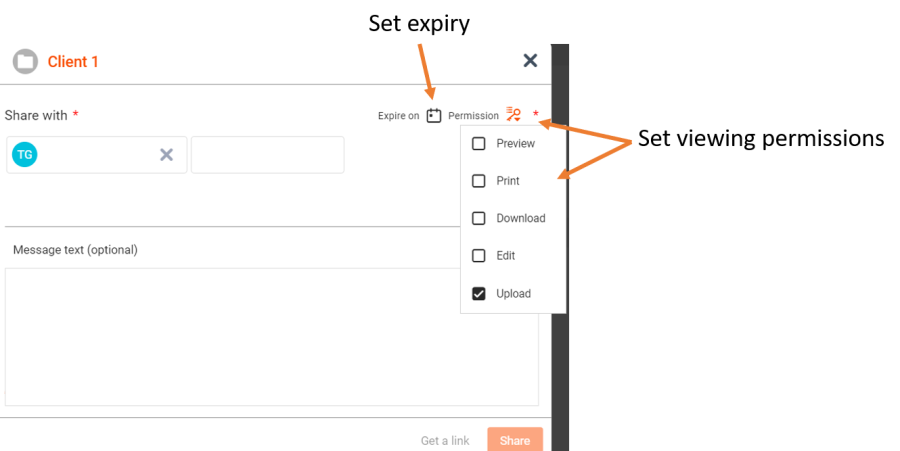
3. Refine the viewing permissions by selecting Preview, Print, Download, or Edit as appropriate. Set an expiry date if desired.


Image Modified
Set permissions for your virtual data room

Sv translation
languageja_JP


  1. 共有できるフォルダを作成します。 以下の例では、共有できるフォルダを作成するだけで、3 つのクライアントに仮想データルームフォルダをセットアップしています。 


仮想データルームとして使用するフォルダを作成します

  1. フォルダ/データルームの [共有] アイコンをクリックし、[共有] ダイアログを表示します。


フォルダ/データルームを共有します

  1. 共有ダイアログで受信者を追加します。 共有オプションで、[アップロード] ラジオボタンをクリックしてアップロードを許可します。  これにより、受信者がファイルとフォルダをアップロードできるようになり、フォルダが仮想データルームに変換されます。


アップロードを許可する

  1. 必要に応じて、プレビュー、印刷、ダウンロード、または編集を選択して、表示権限を調整します。 必要に応じて有効期限を設定します。


仮想データルームの権限を設定します