How to Group Contacts
Note: You will need authorization from your IT department in order to be able to group contacts. If you have permission, use the following steps to group contacts.
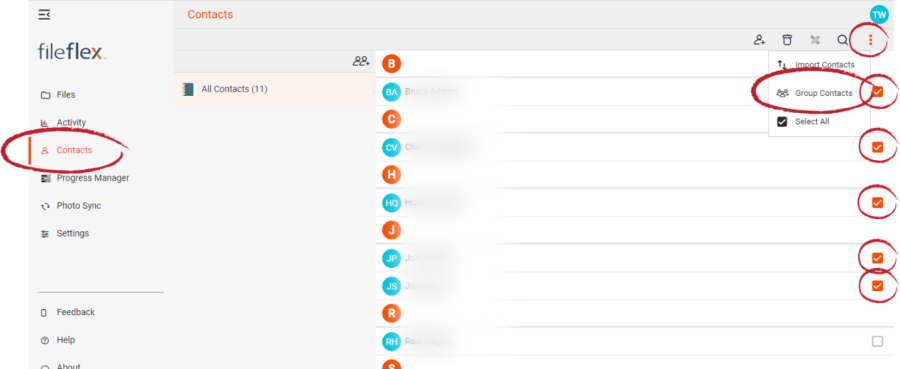
1. Open the contact view by selecting Contacts in the Application sidebar menu
2. Select the contact(s) that you want to group
3. Click the Activity Menu icon in the top right of the Activity Bar
4. Choose Group Contacts
Group Contacts
5. In the Groups dialog box, you can assign the contacts to a pre-existing group or you can create a new group. To create a new group, select Create a new group.
6. In the New Group dialog box, enter a name and then select OK.
