How to Add Networked Storage Devices
Once you have added a server or Network Attached Storage device (NAS) as a content source, you can use that server or NAS to add any other storage device on the same network.
You could add Direct Attached Storage (DAS), Storage Area Network (SAN), private cloud server, and other NAS or servers on the same network or you can add just a specific individual drive or folder from a networked device.
Note: Assigned users to networked storage devices will need to be set up with credentials for that networked device.
To create a networked content source:
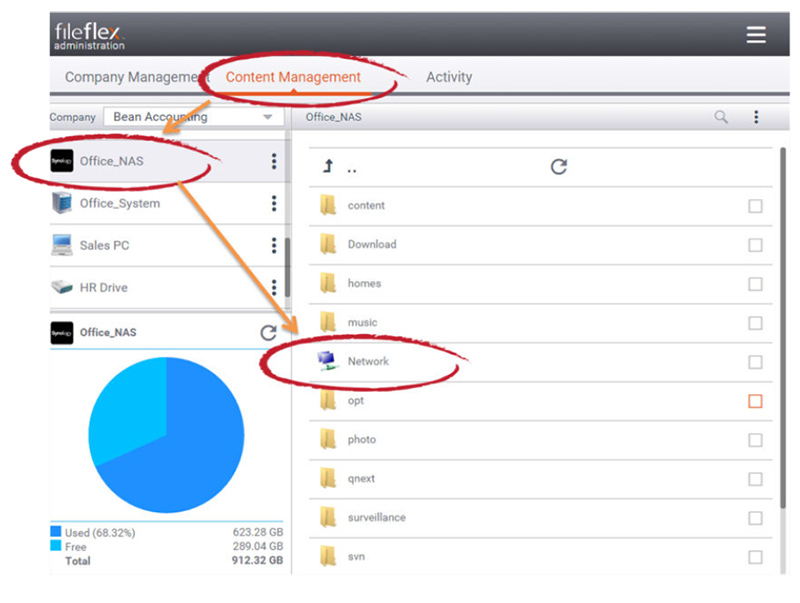
1 Click the Content Management tab
2. Select a content repository that is always on and connected to the internet such as a server or NAS.
3. In the Viewing Panel, navigate to and click the Network icon.
Adding a Networked Device
4. In the list of networked devices, navigate to and select the check box of the device to add to the content provider list. If you only want to add a specific drive or folder, then click on the name of the device, navigate to the drive or folder, then select the check box of the drive or folder to add to the content provider list.
5. Click the right corner menu in the Activity Bar (3 dots)
6. Select Clone with Root Path
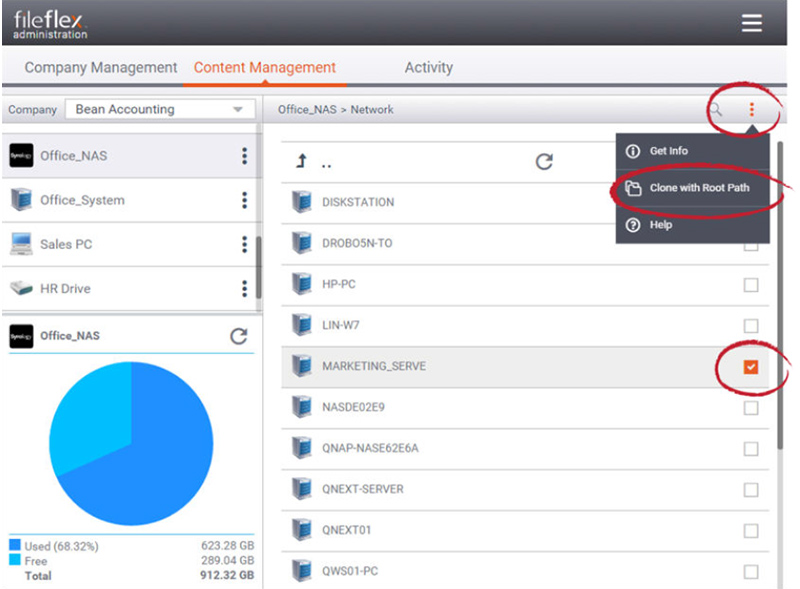
Check Device, Click Menu, and Select Clone with Root Path
7. The specific drive or folder has now been added to your list of content sources. You can edit the name and icon of that specific drive or folder from its menu (3 dots beside the content source).
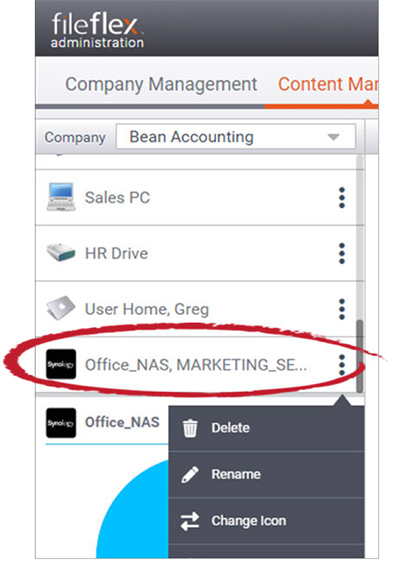
Networked Device Added to Provider List