How to Share Files
Note: To share files, the repository holding the files must be online and available.
Note: To understand repository status and FileFlex file protection better, see Encryption Options. and Understanding Repository Jewels.
1. To share a file with your contacts, check the box next to the file(s) you would like to share, then click the Share icon in the top right Activity bar.
2. Repeat step 2 for multiple contacts.
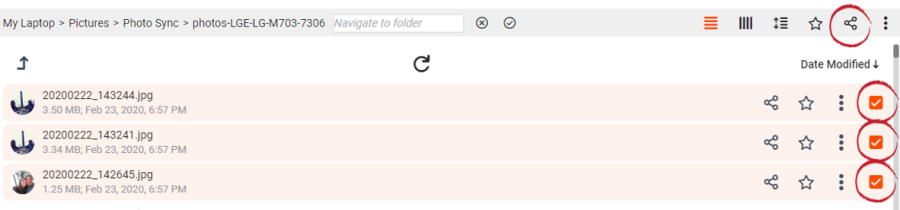
Select the file, then click the share icon
Alternatively you can click on the share icon next to the file you want to share.

Click the Share icon
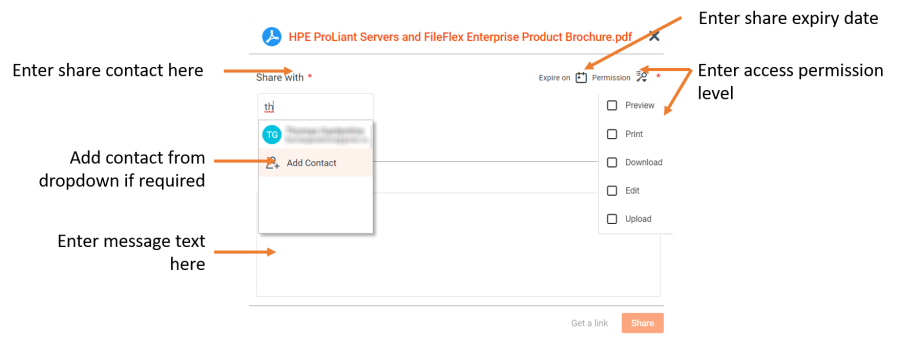
Share options
3. Next in the Share dialog box, in the Share with box type the name of the contact you would like to share the file with. Pick the contact as it appears in the predictive dropdown list. Choose 'Add Contact' from the dropdown if your contact does not appear. If you have permission, you can add your own contacts individually here.
4. Next, you can set an expiry date and time for your file share. By default, it is forever (i.e. Expires on: never). If you wish to change this, click on Share expires calendar icon located in the top right corner of the dialog box and select the end date and time from the calendar.
5.Next, you can enter a message to your share recipients in the Message text box
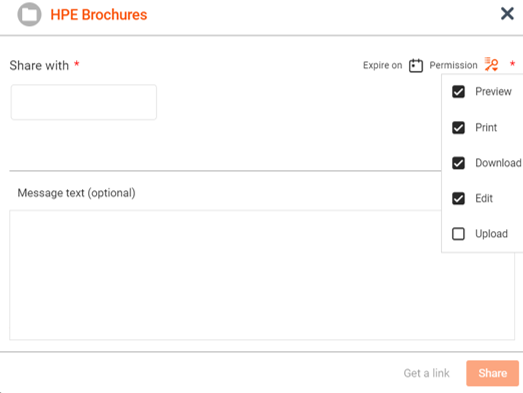
6. Lastly, set your share viewing options (i.e. Preview, Print, Download, Edit and Upload).
Preview - If you choose Preview, the contact (with whom you're sharing your files) will only be able to view the shared files. They are not permitted to print or download shared files.
NOTE: Your contact does not need to have the appropriate app to view these shared files; they can simply view them through FileFlex. For instance, your contact can view a Word file, which you shared with them, on their mobile phone even though they may not have the MS Office on their mobile phones to open a Word file.
Print – Print allows your contact to both preview and to make hard copies of the file(s) shared with them. They are not permitted to download or edit.
Download - If you choose Download, the contact will be able to view, print and download your shared files.
NOTE: If you allow your contact(s) to Download the files, they will, also be able to preview and print the files. That is, if you select Download, Preview and Print will be able automatically selected for you.
Set sharing options - Editing Permitted
Edit - If you choose Edit, the contact will be able to view, download, print and edit the shared files. You are giving your contact the rights to make changes to the shared files.
Upload – This option applies to folders only. This converts the folder into a virtual data room by allowing the recipient to upload files and folders. With Upload selected you can still determine access rights to files stored in the virtual data room folder to view only, view & print, download and edit. These access options can be set on a user-by-user basis.
7. Once you have determined you share options, click on Share.