How to Connect to a Synology NAS
Note: You will need authorization from your IT department in order to be able to connect to a Synology NAS. If you have permission, use the following steps to connect to a Synology NAS.
Step 1: Download the FileFlex Connector
1. Download the FileFlex Connector for Synology to your PC. From your PC, go to http://downloads.fileflex.com/downloads/passive/synology/ and download the connector appropriate to processor of your device - select x86 if your NAS has an Intel processor or ARM if it has an ARM processor.
2. If you are not sure of the processor of your device, sign in to the Synology Disk Station Manager (see Step 2), click Control Panel and then select Info Center.
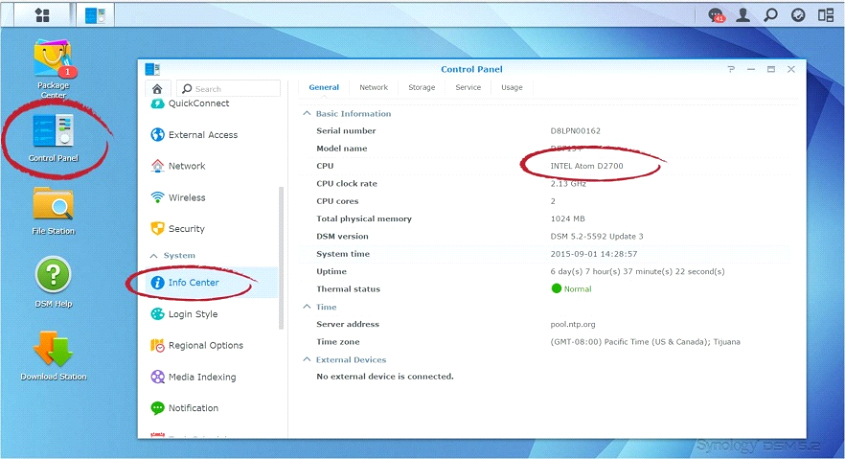
How to find your device processor type
Step 2: Install the FileFlex Connector on the Synology NAS
Note: You must be already set up as a user on the Synology NAS with credentials in place. Users are created by the administrator under Disk Station Manager > Control Panel > User - see the Installation Guide for your Synology NAS model available at Synology's Download Center.
1. Sign in to the Synology Disk Station Manager software (DSM) (For more information about setting up Synology NAS and installing DSM, see the Quick Installation Guide for your Synology NAS model available at Synology's Download Center.)
Note: Make sure your computer is connected to the same network as the Synology NAS and can access the Internet.
a) Open a web browser on your computer and go to find.synology.com.
b) The Web Assistant will find your Synology NAS within the local network. Click Connect to go to the login screen.
c) Enter your user name and password, and click Sign in. The default password for admin is empty.
2. When the Disk Station Manager opens, select the Package Center icon.
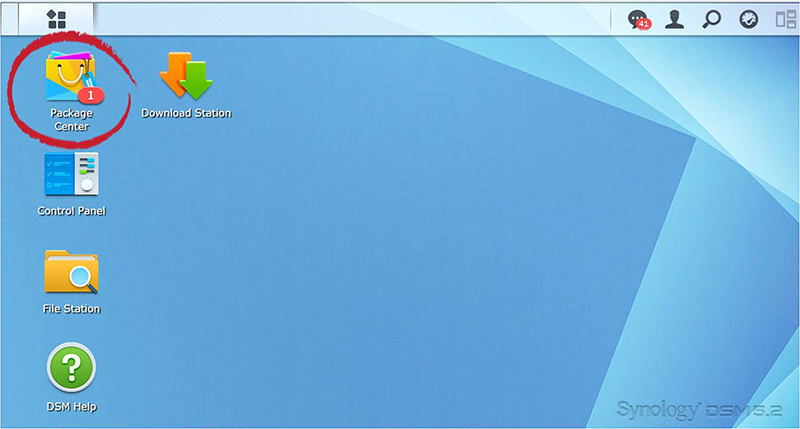
Open the Disk Station Manager and select Package Center
3. When the Package Center opens, select Settings.
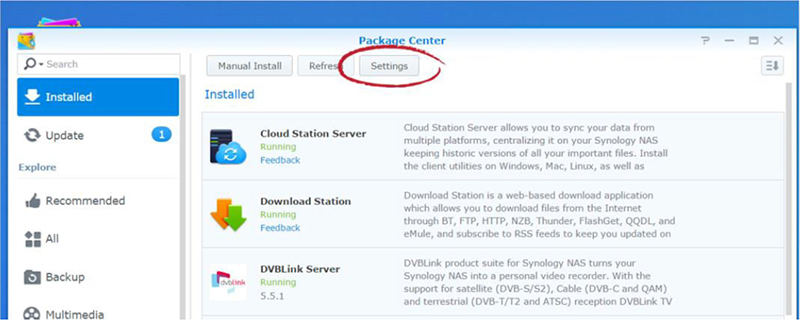
Select Settings
4. The Settings Dialog box will open at the General Tab. Under Trust Level, select the Any publisher radio button, then click the OK button.
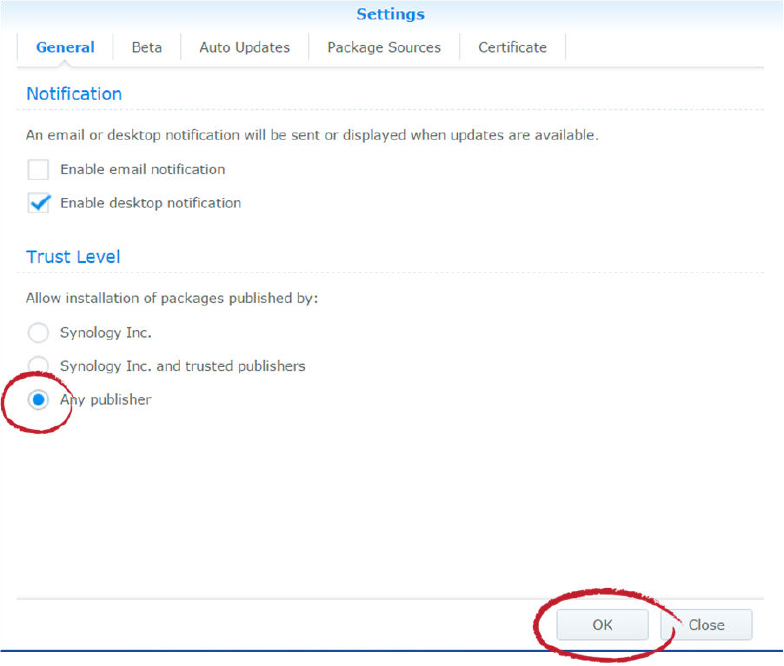
Select the Any publisher radio button, then click OK
5. The Settings Dialog box will close and you will be back at the Package Center Main Menu, from the top menu select Manual Install.
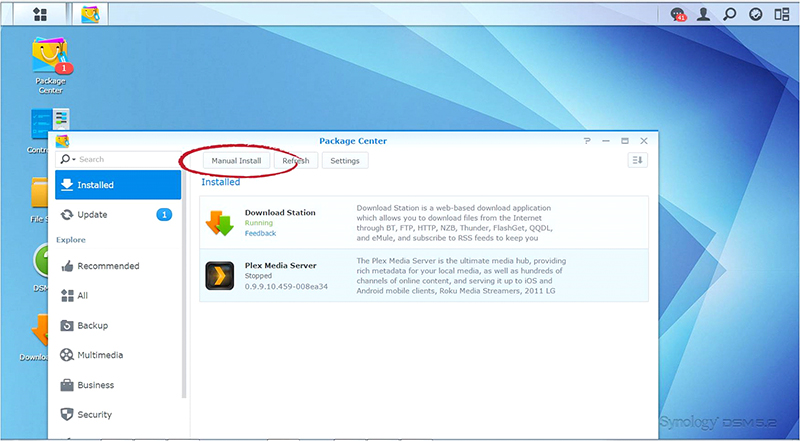
Select the Manual Install
6. When the Upload a Package dialog box appears, click the Browse button and navigate to the FileFlex Connector file that you downloaded in Step 1.
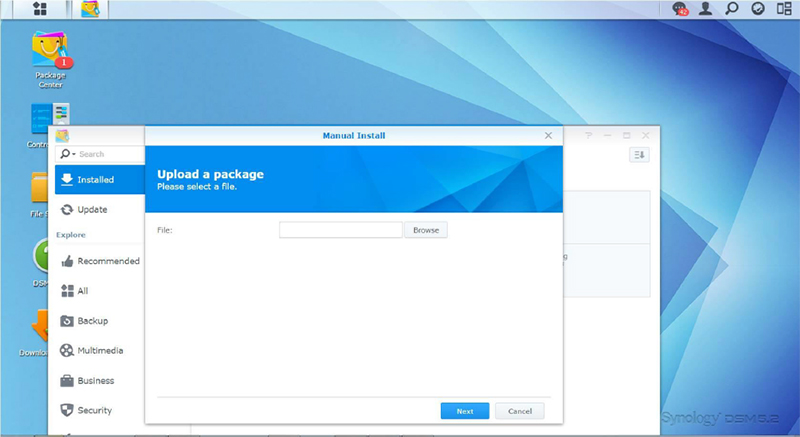
Click Browse and navigate to the FileFlex Connector just downloaded
7. Select the FileFlex Connector and then click Open.
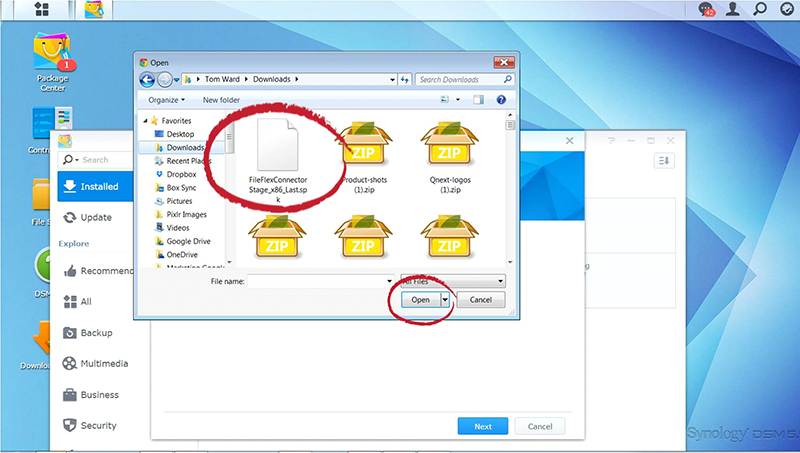
Select the FileFlex Connector file that you downloaded in Step 1 and click Open
8. In the Upload a Package dialog box, click Next.
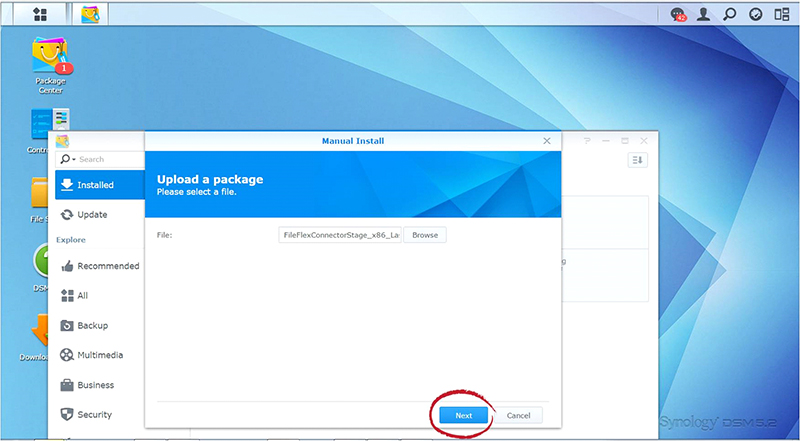
Click Next
9. Make sure that the Run after installation box is checked the click Apply.
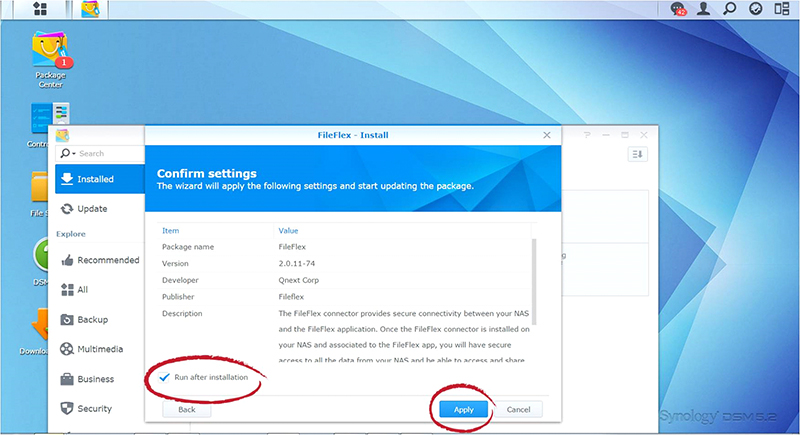
Check Run after installation and click Apply
10. Congratulations, you have successfully installed the FileFlex Connector on your Synology NAS. You should see FileFlex Connector installed and running in the Package Center.
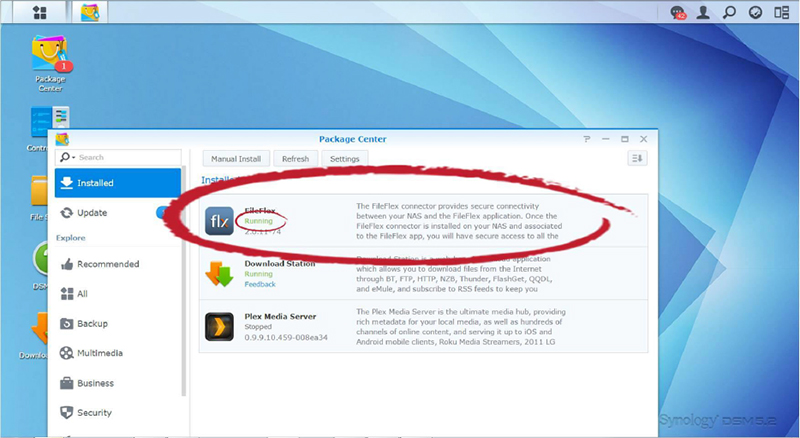
Check to make sure FileFlex is installed and running
Step 3: Link your FileFlex account to the Synology NAS
NOTE: The PC should be connected to the NAS over the same network.
1. Next, you must link your FileFlex account to your Synology NAS. From your PC or mobile device with FileFlex already installed and connected to the NAS over the same network whether via LAN or Wi-Fi, open FileFlex.
2. Select the 'Files' view in the left navigation menu
3. In the My Content tab, select the large red '+" Add Content Source icon
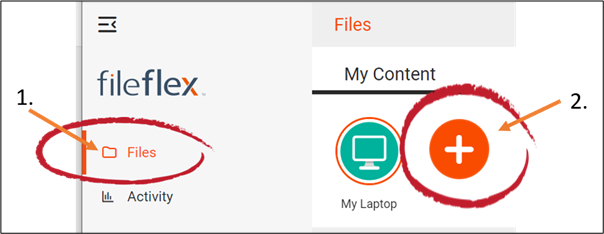
Select Add Content Source Icon
4. Select the Synology icon and run the setup wizard.
Note: You must be on the same network of the Synology NAS being added, via either LAN or WiFi. After you have added the NAS as a content source, it can be accessed over the internet.
5. The activation page will now appear that will link your Synology NAS to your FileFlex account. You will need to enter the following credentials.
Note: The user must be already set up as a user on the Synology NAS with credentials in place. Users are created by the administrator under Disk Station Manager > Control Panel > User - see the Installation Guide for your Synology NAS model available at Synology's Download Center.
Username - This is the username of the credentials you use to access the Synology NAS on the network.
Password - This is the password of the credentials you use to access the Synology NAS on the network.
Domain (Optional if not part of a domain) - If your NAS is on a company or corporate domain, you will need to enter the domain that your server belongs to. Leave this blank if you are not sure or contact your IT department for your domain name.
Activation Code - This code is entered automatically for you. For security reasons the code is time-limited and will time-out if not used shortly. If the code does time-out, you will need to start again at Step 1.
6. After you have entered your user credentials, click Activate.
Congratulations - You have connected FileFlex to your Synology NAS. You can now remotely access any of the storage that is attached to that NAS. To do so, using FileFlex, open the Synology repository that you just created, navigate to the files and folders that you wish to access, then save it to your Favorites directory for easy future access.